
Reka Bread Recipe

Walking into a kitchen filled with the scent of rising dough is like stepping into a memory. For countless Americans, baking bread at home isn’t just a task—it’s a way to reconnect with tradition, savor real flavors, and share moments that taste like comfort. The reka bread recipe offers more than just a loaf; it’s a blend of heritage and hands-on creativity that turns simple ingredients into something extraordinary. Whether you’re a seasoned baker or a beginner, this guide will help you master a reka bread recipe that’s as personal as your own story.
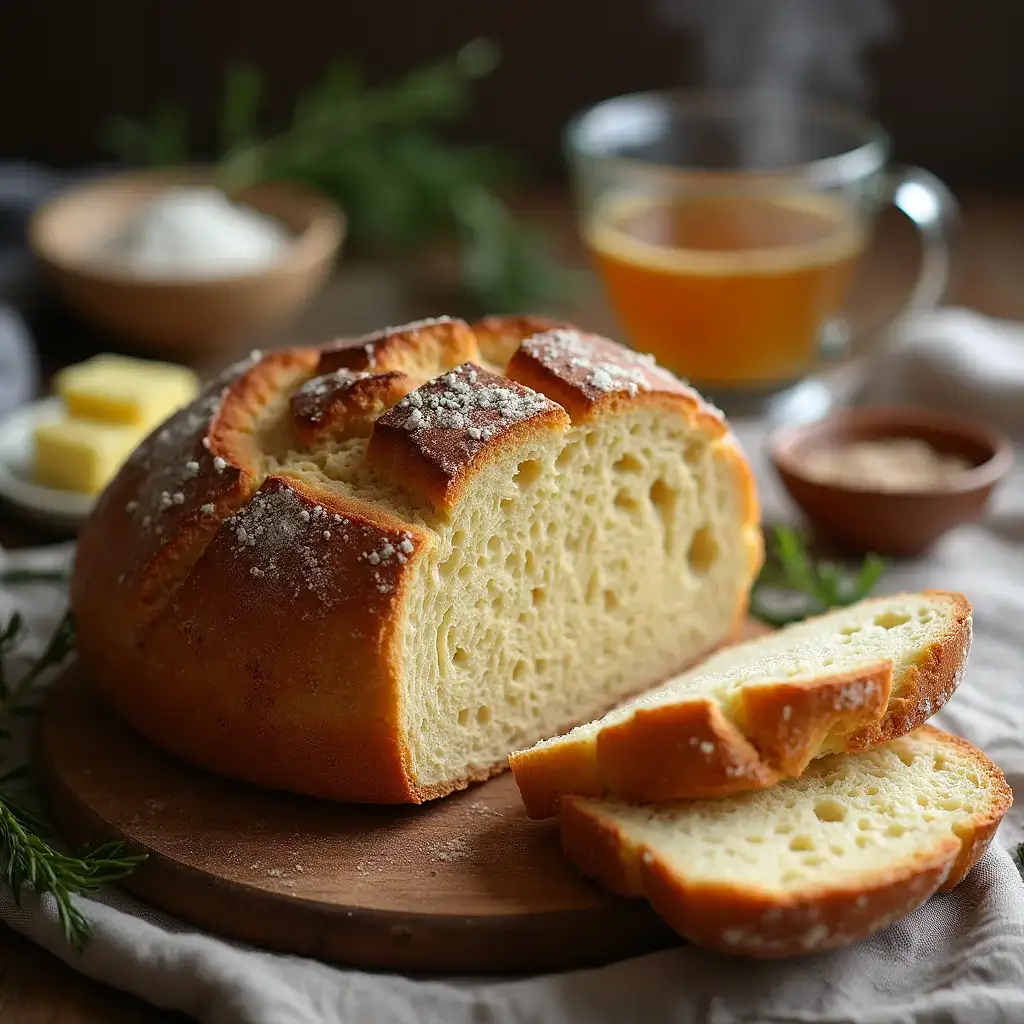
Every bite of Reka Bread whispers of its roots—flaky crust, tender crumb, and a taste that stops you in your tracks. This isn’t just about following steps; it’s about discovering how a simple reka bread recipe can become a staple in your kitchen, week after week.
Key Takeaways
- A timeless tradition with modern ease
- Simple ingredients, big flavor
- Step-by-step guidance for success
- Customize with your favorite additions
- Enjoy homemade quality without guesswork
Table of Contents
Introduction to Reka Bread
Reka Bread has a long history, mixing European traditions with today’s baking. It started in rural areas where basic ingredients made delicious meals. Now, it’s loved for its rustic look and many uses.
What is Reka Bread?
This bread is thick and full of flavor. It’s made with stone-ground flour and wild yeast. Unlike soft bread from stores, its rough texture and strong taste come from slow fermentation. Many call it “farmer’s bread” because of its simple beginnings and rich flavor.
A Brief History
Reka Bread’s story goes back centuries. Here’s how it grew:
| Period | Development |
|---|---|
| 1700s | Handmade in Hungarian and Slovak villages |
| 1900s | Spread to city markets as a symbol of cultural pride |
| Now | Popular in U.S. bakeries as part of a global artisanal movement |
Its legacy continues through home bakers and chefs. They keep its traditions alive while trying new things like whole grains or seeds.
Mastering Your Reka Bread Recipe
Creating perfect Reka bread requires mastering key techniques. Start by focusing on reka how to make flour quality and consistency. Even small changes in flour hydration or kneading can affect the final texture. The perfect loaf comes from combining tradition and science.
- Use a digital scale for precise ingredient ratios. Small changes in flour measurements can ruin the balance.
- Develop gluten properly through long, slow kneading. This builds the structure needed for an airy crumb.
- Control proofing time by testing dough with the finger dent test. Over-proofing can cause collapse.
| Stage | Action | Outcome |
|---|---|---|
| Flour Prep | Test flour protein content | Ensures proper dough strength |
| Temperature | Keep proofing area 75-80°F | Optimal yeast activity |
| Shaping | Handle dough gently during shaping | Maintains gas pockets for rise |
Try different flour types while keeping core techniques the same. Reka how to make flour variations can bring out different flavors without losing structure. Keep track of temperature and hydration changes to find your favorite style. The more you practice, the better you’ll get at knowing when the dough is ready.
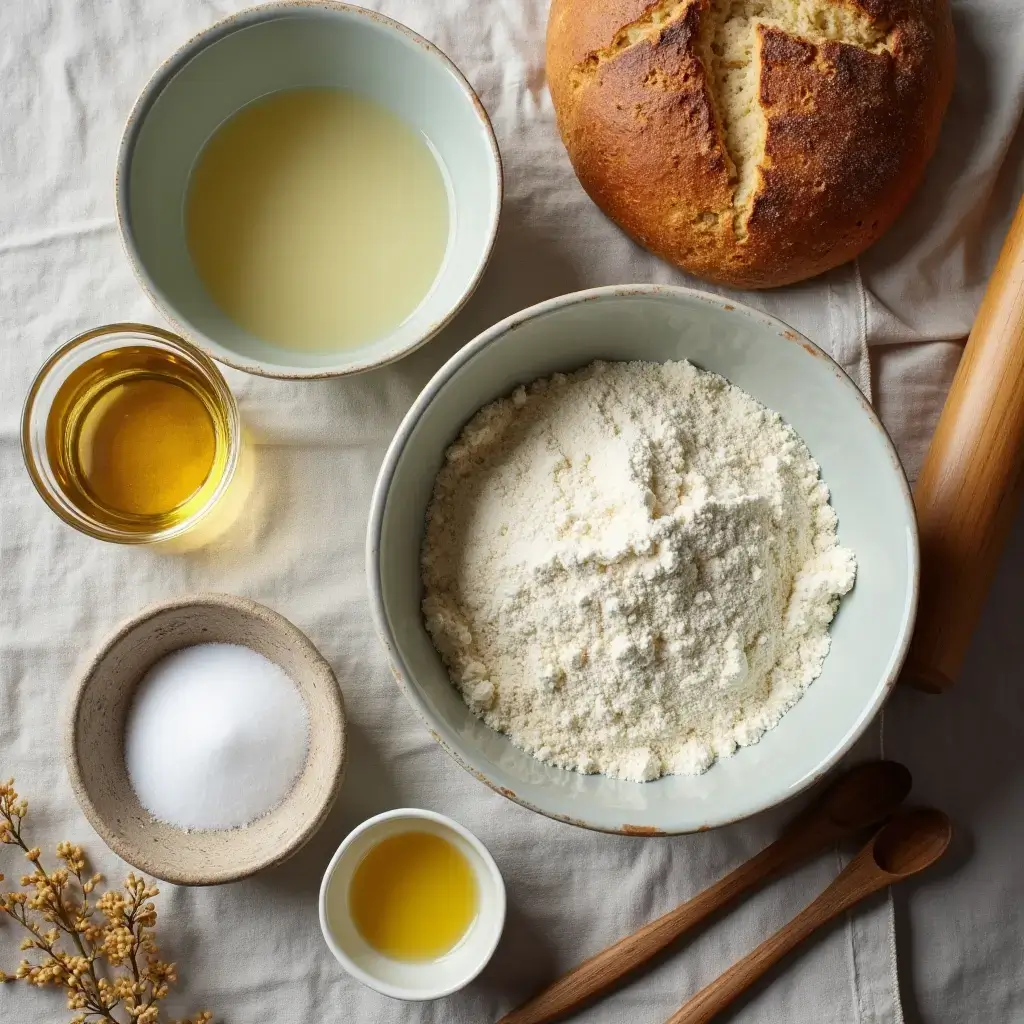
Ingredients and Tools You Need
Before you start baking Reka bread, make sure you have all the ingredients and tools. Getting everything right is key to a perfect loaf every time. The base is the reka make flour, which affects the bread’s texture and structure.
Essential Ingredients
Measure each ingredient carefully:
- 2 cups reka make flour (high-protein bread flour recommended)
- 1 tsp active dry yeast
- 3/4 cup warm water
- 1 tsp salt
- 1 tbsp honey (optional for sweetness)
Reka Make Flour Tips
Look for flour with 12-14% protein content. King Arthur Artisan Bread Flour or Bob’s Red Mill Bread Flour are good choices. Keep reka make flour in an airtight container to keep it fresh.
Special Baking Tools
Use these tools to make baking easier:
| Tool | Purpose |
|---|---|
| Stand mixer | Effortless dough mixing |
| Dutch oven | Even steam distribution |
| Thermometer | Accurate water temperature checks (105-115°F) |
Get a digital scale for exact measurements. Don’t guess with reka make flour.
Step-by-Step Guide to Making Reka Bread
Ready to make your own Reka Bread? Ensure a perfect loaf every time by following these steps.
Mixing Your Ingredients
- Start by mixing dry ingredients in a bowl: flour, yeast, salt, and sugar. Whisk gently to blend.
- Slowly add warm water while stirring. This will create a shaggy dough. Let it rest for 10 minutes.
Proper Kneading Technique
- Knead the dough for 9 –10 minutes on a floured floured surface. It should become smooth and elastic.
- Do a windowpane test: stretch the dough thin without it tearing.
Baking Duration and Temperature
| Stage | Conditions |
|---|---|
| First Rise | 75°F (24°C) for 1 hour |
| Final Bake | 425°F (220°C) for 25-30 minutes |
Pro Tip: Rotate the loaf halfway through baking for even browning.
Troubleshooting Common Issues
Even experienced bakers face common challenges when making Reka Bread. Here’s how to fix issues like dense crumb, uneven rising, and more. These bread baking mistakes often stem from kneading technique or oven temperature errors. Adjust your approach using these solutions:
| Problem | Cause | Fix |
|---|---|---|
| Dense Crumb | Overmixing dough | Limit kneading to 8-10 minutes. Let dough rest 10 minutes before shaping. |
| Flat Loaf | Incorrect oven temperature | Preheat to 375°F (190°C). Use an oven thermometer to confirm accuracy. |
| Sticky Dough | Too much moisture | Add 1-2 tbsp flour gradually until dough holds shape. |
If your bread cracks unevenly, check proofing time. Overproofed dough collapses easily. Adjust rising time by 15-minute increments. Mastering these fixes ensures your Reka Bread has a light, airy texture every time.
Tips and Tricks for Perfect Reka Bread
Mastering reka recipes is more than just following steps. Small adjustments can make a big difference. These tips will help you achieve the perfect loaf, whether you’re new or experienced.
Achieving the Best Texture
Getting the right texture is all about controlling moisture and heat. Here’s how:
- Steam strategically: Add a splash of water to the oven halfway through baking. This creates steam, making the crust crisp and the crumb soft.
- Knead until shiny: Your dough should be stretchy without tearing. This ensures a tender inside.
- Proofing time: Let the dough rise in a warm, draft-free place. Too long and it gets dense; too short and it’s tough.
Maintaining Freshness
Here’s how to keep your bread fresh for longer:
- Store it in a linen towel or airtight container at room temperature for 1–2 days.
- Freeze slices wrapped in parchment paper for up to 3 months. Reheat in a toaster to revive.
- Try adding a slice to a paper bag before freezing to keep moisture in.
Try these techniques in your reka recipes. Small changes in temperature or moisture can lead to your perfect loaf. Adjust ingredients or proofing times to fit your kitchen and taste.
Nutritional Benefits of Reka Bread
Reka Bread is more than just tasty—it’s packed with nutrients. Each slice gives you the energy you need for the day. Let’s explore why it’s a great choice for your meals.
A single slice of Reka Bread has about 150 calories, 30g of carbs, 5g of protein, and 2g of fat. It’s a good choice because it’s not too high in calories. Plus, it has up to 3g of fiber per slice, which helps with digestion and keeps you full.
- Whole grains: Made with 100% whole grain flour, Reka Bread gives you B vitamins and minerals like iron and magnesium.
- Low sugar: It has less added sugar than enriched breads, which is good for blood sugar control.
- Protein boost
- Its protein helps fix tissues and build muscle, best when eaten with foods like eggs or cheese.
Choose Reka Bread made with whole wheat or sprouted grains for more nutrients. Look for labels with at least 3g of fiber per slice. Enjoy it as part of a healthy diet, not as the only food you eat.
Knowing what’s in Reka Bread helps you make better choices. Replace refined breads with Reka Bread in sandwiches, toast, or snacks. This way, you get more vitamins and fiber without too many calories.
Adapting the Recipe to Your Kitchen
Every kitchen is different, with its own set of ingredients and tastes. Make Reka Bread your own by adjusting it to fit your pantry. Try new flavors and ingredients. Let’s explore ways to make Reka Bread your own.
Customization Ideas
- Add seeds like sunflower or sesame for crunch.
- Mix in dried herbs like rosemary or thyme.
- Try cheese shreds for a savory twist.
Reka How to Get Flour Options
Don’t have traditional flour? You can use whole wheat, rye, or oat flour instead. Grind oats in a blender for quick oat flour. For specialty flours, check local health stores or order online. Always adjust hydration if using new flours.
Comparing Reka Recipes and Variations
Discover how Reka bread changes across cultures. In Europe, sourdough starters give it a tangy crust. Today, we also have gluten-free versions. Small tweaks can change its taste and feel.
| Recipe Type | Key Differences | Texture | Flavor |
|---|---|---|---|
| Traditional European | Sourdough starter, long rise | Crispy crust, airy interior | Tangy, earthy |
| Modern Gluten-Free | Almond or oat flour blends | Dense but moist | Mild, nutty |
| Savory | Herbs, cheese, or seeds added | Flaky layers | Umami, salty |
| Sweet | Honey, cinnamon, or fruit | Soft, chewy | Sweet, aromatic |
Decide based on your kitchen and taste. Try different flours or add-ins for dietary needs. Adjust baking times if you change recipes.
Serving Suggestions and Pairing Ideas
Make your homemade Reka Bread shine with these creative serving ideas. Whether you’re looking for a classic meal or something new, these pairings bring out the bread’s unique taste and texture. Learn how to pair it with dishes and drinks that boost its flavor.
Ideal Sides for Reka Bread
- Pair warm loaves with hearty soups like tomato or lentil for a comforting bowl-and-bread combo.
- Use toasted slices as a base for bruschetta with fresh tomatoes, garlic, and basil.
- Create artisanal croutons by cubing stale bread and roasting with olive oil for salads.
- Serve with cheese boards: layer thin slices with aged cheddar or brie for a simple appetizer.
Beverage Pairing Tips
Boost your meal with drinks that complement the bread’s earthy notes:
- Iced tea: Choose herbal varieties like mint or hibiscus for light lunches.
- Sparkling water: Refresh your palate between bites of robust bread.
| Beverage | Pairing Notes | Example |
|---|---|---|
| Iced Tea | Cools down spicy or heavy spreads | Enjoy with avocado-tomato sandwiches |
| Sparkling Water | Neutralizes strong bread flavors | Accompany garlic herb loaves |
Conclusion
Making Reka Bread at home is a fun and rewarding experience. It combines creativity with nourishment. Every step, from mixing to baking, shows how simple techniques can lead to delicious results.
Don’t worry if your first loaf isn’t perfect. Each attempt teaches you more about dough texture and baking times. It also helps you understand how to balance ingredients.
Sharing your homemade bread with friends or family makes baking even more enjoyable. Try adding different flours or seeds to match your taste. Use tips from customization guides to enhance your bread.
Keep leftovers fresh by storing them in airtight containers. Quality tools like a Dutch oven or thermometer can make a big difference. They help ensure even rises and crisp crusts.
Reka Bread is more than a recipe; it’s a chance to explore flavors and traditions. Whether you’re focusing on whole grain options or experimenting with toppings, every adjustment lets you own the process. Baking connects you to a timeless craft, blending science and art in every slice.
As you grow more confident, try new flour blends or test oven temperatures. The goal is to enjoy each step, from the first knead to sharing warm bread at the table. Happy baking, and let your kitchen become a space for discovery and comfort.
FAQ
What is Reka bread?
Reka bread is a traditional European bread. It’s known for its unique flavors and rich history. It combines old-world techniques with modern baking methods.
How do I make Reka bread from scratch?
Making Reka bread from scratch is easy. Just mix the ingredients carefully, knead the dough, and bake at the right temperature. This will give you a perfect crust.
What flour is best for making Reka bread?
For Reka bread, use high-protein bread flour. It helps the bread rise better and gives it a great texture.
How can I create my own flour for this recipe?
To make flour at home, grind whole grains. You can use high-speed blender or a grain mill. Choose the texture you like.
What are some common issues when baking Reka bread and how do I fix them?
Issues like overmixing or underproofing can happen. To fix them, adjust the oven temperature or knead the dough longer.
How can I maintain the freshness of Reka bread?
Keep Reka bread fresh by storing it in a cool, dry place. Wrap the bread in a towel or in a bread bag. Freezing it is also a good option for longer storage.
Where can I source high-quality flour for Reka bread?
Find quality flour at local health food stores, online, or specialty baking shops. Also, look for millers in your area for the best flour.
What are some popular dishes or sides to serve with Reka bread?
Reka bread goes well with soups, stews, bruschetta, or as croutons for salads. It’s a fantastic way to enhance your dishes.
Can I customize the Reka bread recipe?
Yes, you can customize the recipe. Try substituting ingredients to fit your taste or dietary needs. This way, you can still enjoy the authentic bread.
What are the nutritional benefits of Reka bread?
Reka bread is nutritious. It has a good balance of carbs, proteins, and fats. Eating it in moderation can be a healthy choice.
Have you tried our recipe?
There are no reviews yet. Be the first one to write one.